Make Your Own Labels Free and Without a Label Maker

Small label for airplane instrument panel
You can make your own custom labels, displaying any text, even pictures, without use of a label maker. The labels have a waterproof surface, are self-adhesive, and stick to virtually any surface. The cost of each label is just a few cents. This post describes how to create such labels.
The photo shows a label we made 2016 for our airplane. It shows no sign of aging. In the meantime, we have become more adept at the process and produce a more accurate label boundary. We include the example since it is the oldest label we have made with the method described below.
Required Equipment
You need a computer with Microsoft Word and a printer.
Required Materials
You need high-quality paper for the printer, available at any office supply store. You also need three more items, readily obtained at any hardware store:
- Aluminum duct tape with UL listing UL181A-P. According to the UL standard, the tape has a minimum width of 2.5 in. It is readily available up to 3 in. width.
Caution: Do not try to use aluminum duct tape that is not listed as UL181A-P. The UL listing guarantees that the tape has passed a number of tests, including Temperature, Static Load, Tension, Mold Growth, and Humidity. Several of these properties are important here. - Packing tape from a reputed manufacturer, readily available up to 3 in. width.
- Optional: one sheet of super fine sandpaper, with grit at least 600.
We first describe the case where the width of the smaller side of the label does not exceed the width of the aluminum tape minus 0.25 in. as well as the width of the packing tape minus 0.25 in. Since 3 in. wide aluminum tape and packing tape are readily available, we assume that width for the moment. Thus, the smaller side of the label cannot exceed 3 – 0.25 = 2.75 in. Later we see that, with appropriate modification, larger widths of the smaller side of the label can be handled.
The width of the larger side of the label can be anything.
Make Your Own Label
Design the label with Microsoft Word. This can include reversal of black and white, so the letters may be white on black background. You may include photos, even in color if you have a color printer.
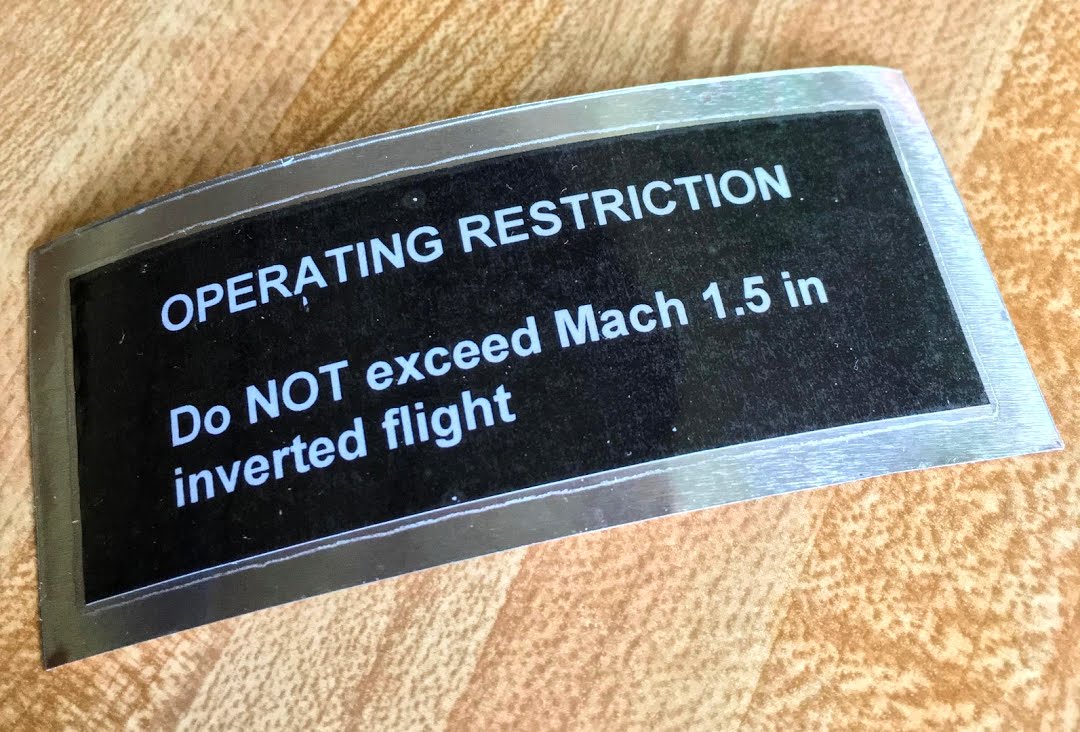
As an example, we have produced a placard label that impressed us many years ago in a Piper J3 Cub. The plane was designed in the 1940s and still is produced today in various versions. It is the iconic aircraft for slow flight, and for landings and takeoffs in rugged terrain.

Piper J3 Cub. Credit: Ahunt of English Wikipedia

Operating restriction for Piper J3 Cub
You may also use any image available for the label, say in pdf or jpeg format, provided the label can be printed with at least 300 DPI. Make sure that you observe applicable copyright laws.
Print the label on high-quality paper and cut it out. For precision, do not use scissors, but an X-Acto knife or a carpet knife.
Prepare a work area that is smooth and has no dents or other surface imperfections. A glass plate or sheet of Lexan or acrylic or similarly smooth material is perfect. Clean the work area very carefully. There cannot be any dust or other particles.
Prepare the Aluminum Strip
Cut off a piece of the aluminum duct tape that is long enough that you not only can place the label on it, but have an excess of at least 1/8 in. width all around the label.
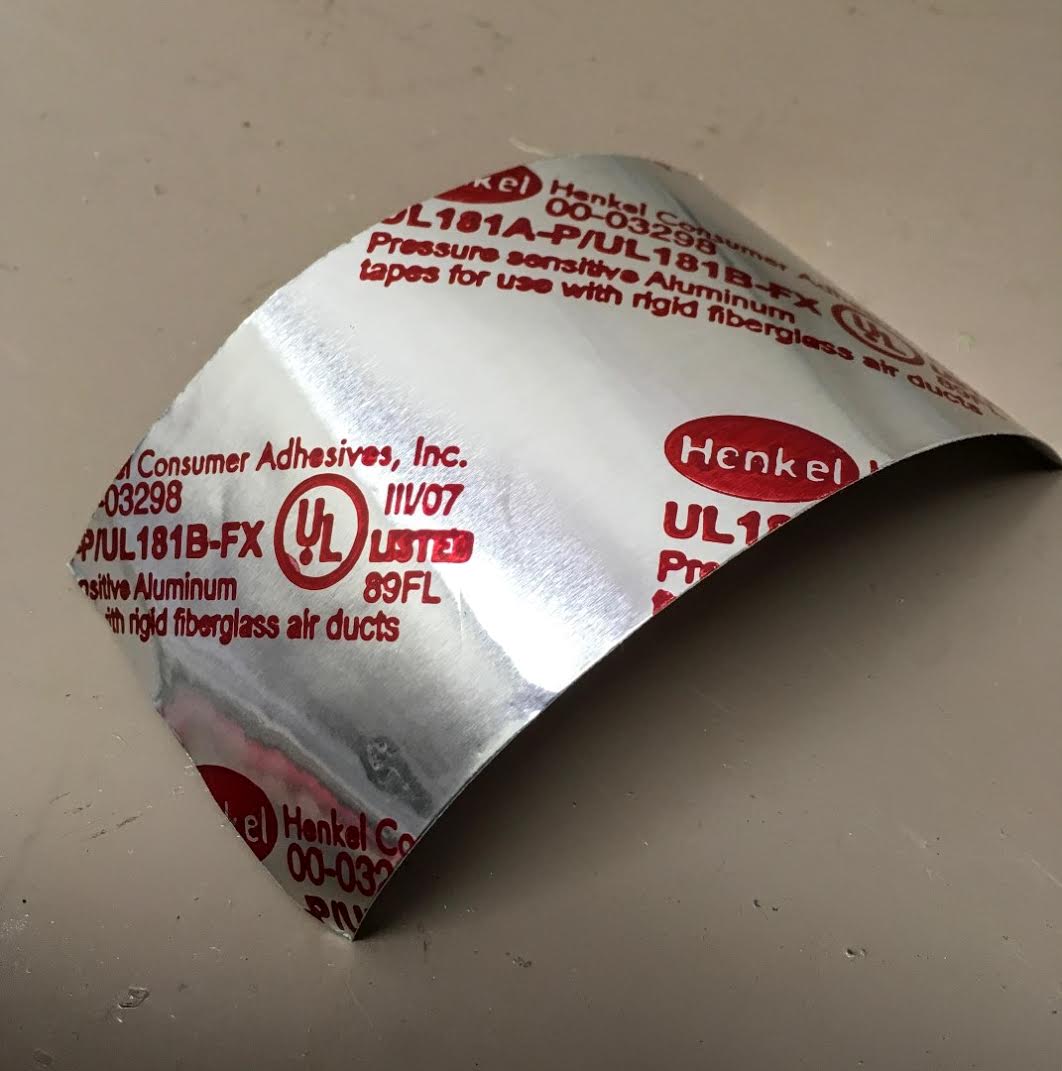
Aluminum strip with printed UL listing
Aluminum duct tape with UL181A-P listing typically has the UL listing plus some additional information printed on the shiny surface. In fact, if that information is not listed on the tape, don’t use the tape. Remove the printed information with lacquer thinner. The end result is a shiny surface without any imperfections.
Optional: Place the aluminum strip shiny-side up on a flat surface away from the work area. Sand the strip very lightly with the super fine sandpaper, using strokes parallel to the long side of the strip. Do not press down since then you gouge grooves into the soft aluminum. Stop when the surface has taken on a brushed look. Just a few light swipes along the strip achieve this effect. Remove all metal particles from the strip.
Place a blank page of paper on the work area, and place on it the aluminum strip, shiny side up.
Assembly
Using masking tape, fix one end of the aluminum strip and the paper to the work area. In the photo, this has been done on the upper right corner. The strip likely is curved. Gently push it down onto the paper, without causing any kink in the strip, and attach the other end of the aluminum with masking tape to the paper. Still holding down the aluminum strip, attach the opposite side of the paper with masking tape to the work area. When you release the pressure on the aluminum tape, it will stay more or less flat.

Aluminum strip held down with masking tape
Place the label on the aluminum strip so that the distance to the edge of the strip is at least 1/8 in. all the way around. The long side of the label should be parallel to the long side of the strip.
Cut off a piece of the packing tape that is a bit longer than the aluminum strip. Stick one end of that piece to the work area next to the point where both paper and aluminum strip have been attached to the work area. Hold up the other end of the packing tape strip using gentle tension.
Gently lower the other end of the packing strip onto the work area. While doing so, push the tape strip onto the label and aluminum strip, starting from the end where the packing tape has been attached to the work area. In the process, the packing strip may also cover part of the paper. Ignore that aspect.
Go over the covered portion of the aluminum strip one more time with a cloth, pressing down so that the packing strip really bonds to the label and the brushed aluminum strip.
Make sure there are no bubbles, kinks, or included dust particles. If such happens, never mind and start over. In fact, you may well require several attempts before you have a perfect cover of the label on the aluminum strip by the packing tape.
In the above process it is not important that you cover all of the aluminum strip. But the label plus a 1/8 in. border around the label must be covered.
Finished label
With an X-Acto knife or carpet knife you could try to cut out the label plus a border. The width of the border is not critical, but it should be at least 1/8 in. and, most importantly, even all the way around.
You may find that the cutting process is not so easy, due to the softness of both packing tape and aluminum tape. So instead we use a carpet knife as if we wanted to cut, but apply so little pressure that we only create grooves in the packing tape. Then we use scissors to convert the grooves into actual cuts. Trim the four corners of the border of the label any way you like, or not at all.
Installation
Remove the backing material of the label and place the label on the intended surface. Do this very, very carefully, since the glue material of the duct tape is designed to stick forever to almost anything. Press down from the inside out to firmly affix the label.
Variations
You can produce a wider aluminum strip by laying two strips next to each other, without a gap and without overlap, and taping them together on the backing side with Scotch tape. You then attach the combined strips to the paper with masking tape.
Large label covered with strips of Scotch tape
You could try to use several strips of packing tape, one next to the other without gap or overlap. It seems almost impossible to do this. An easier solution is to use Scotch tape and lay down parallel strips without gap or overlap. We have been able to do this. On the final product it was hardly noticeable that several strips covered the label. The transparent Scotch tape also has the feature that it produces a surface with very little glare. The photo shows a label covered that way.
The 1/8 in. wide border specified above should not be reduced. But the border can be increased if so desired.
You may color the shiny surface of the aluminum strip with a marker pen before placing the label on the strip. This produces a colored border. Of course, you need only cover the area that eventually will become the border, plus some margin for slight variations in the placement of the label on the strip. Before you use such coloring, test that the packing tape bonds to the colored aluminum strip just as well as to the original shiny surface.

Hobbs meter with label of prior hours
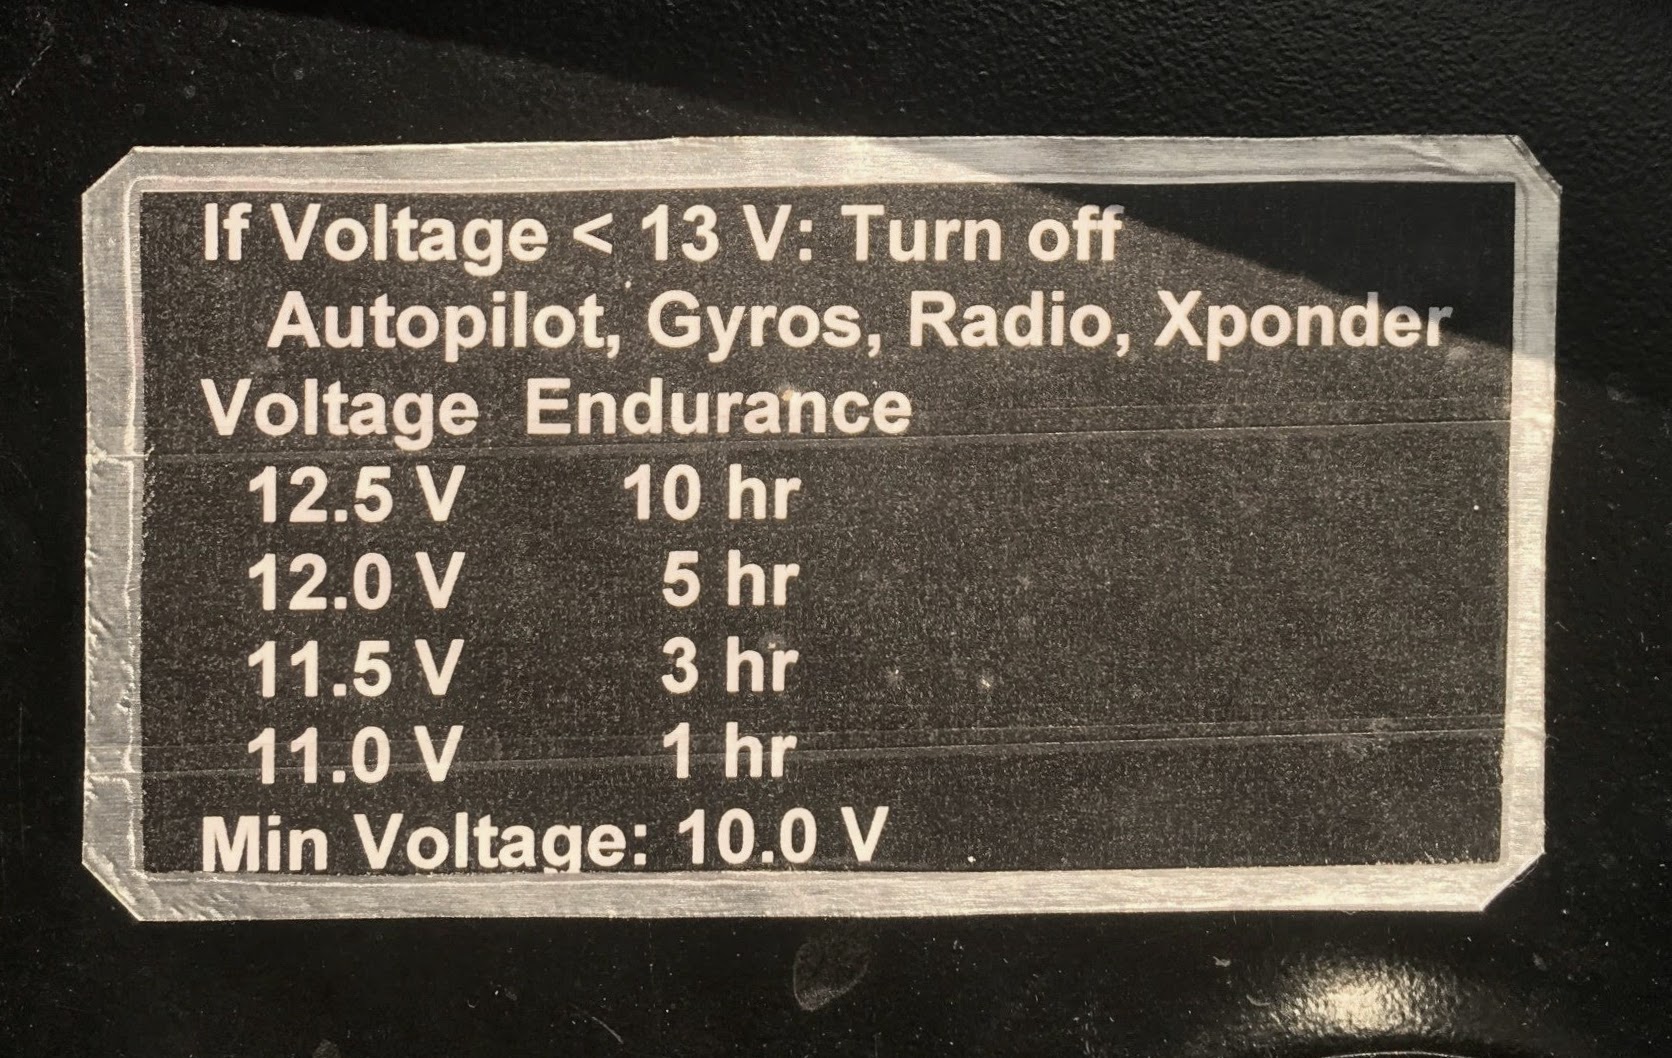
Another Example Label
The Hobbs meter in our airplane records the total time the airplane has been in service. When the meter failed after 1,950 hrs of service, we replaced it with an improved version that, unfortunately, can only be obtained with a starting time of 0. We added a small label below the new meter with the reminder that one must add 1,950 to the displayed time to get the total time in service.
How long will the label last?
The UL181A-P listing guarantees that the label will never peel or come off except when exposed to very high temperature.
Any fading of the label depends on the quality of the paper and the ink or toner of the printer. We started to make some labels with a laser printer in 2016. The label at the beginning of the post and the large label shown in the Variations section, which were among the first efforts, have not shown any sign of fading.
Have any questions or feedback about this process? Please share your thoughts in the comments.
